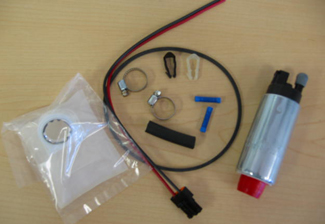
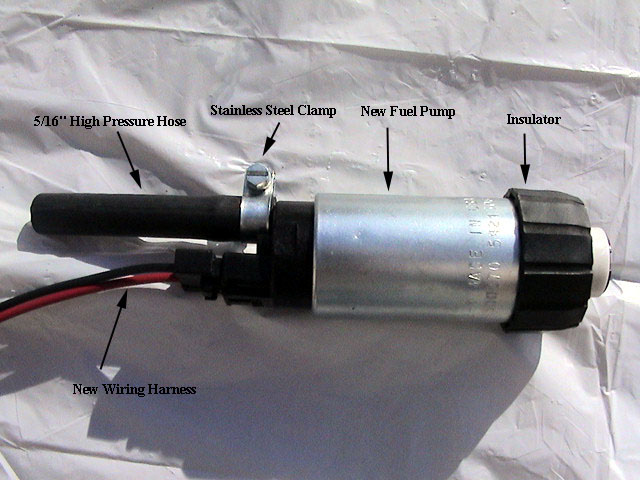
The Super Coupe Performance in-tank electric fuel pumps are rated at 190lph (35gph@ 54psi) or 255lph (50gph@ 58psi). A 255lph (HP)(48gph@ 67psi) is also available upon special request for owners running very high boost levels on supercharged applications. The 190 lph pump kit and is an excellent replacement for stock engines and cars that have minor bolt-on parts. The 255 lph pump kit is excellent for higher horsepower cars or supercharged cars.
Typically, at wide open throttle, full power, an engine requires 0.5 lbs. of fuel per horsepower every hour. A gallon of gasoline weighs approximately 6 lbs. Therefore an engine rated at 350 horsepower will require about 175 pounds (29 gallons) of fuel every hour. (350HP x .5lbs = 175 lbs of fuel, 175 lbs/6 lbs = 29 gallons per hour) If you were looking to support a 406hp 3.8L SC engine your pump would need to flow at least 33.83gph of fuel. Keep in mind as fuel pressure increases the GPH decreases. Stock fuel pressure is around 32psi - 34psi with the vacuum connected to the fuel pressure regulator. Normally aspirated engines will see about 45psi max of fuel pressure. Supercharged fuel pressure can see about 1 psi above 45psi for every lb of boost the engines sees. So a Thunderbird SC with 33lbs of fuel pressure at idle with a 15psi supercharger setup will see up to 58psi of fuel pressure. As the charts show the individual pump flow data you need to know before selecting the proper size fuel pump for your application.
Fuel Pump Diagnosis:
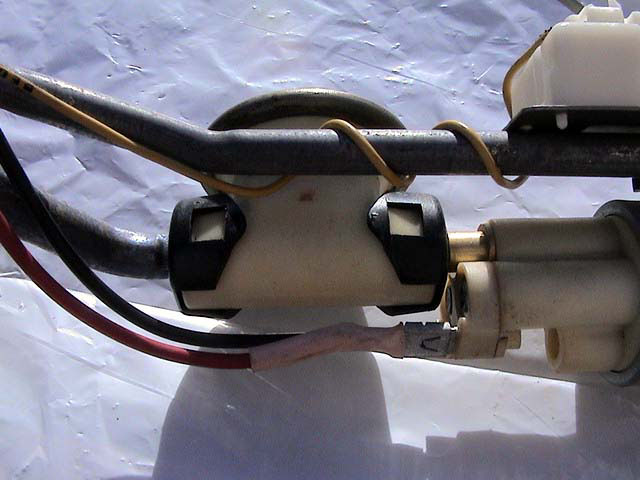
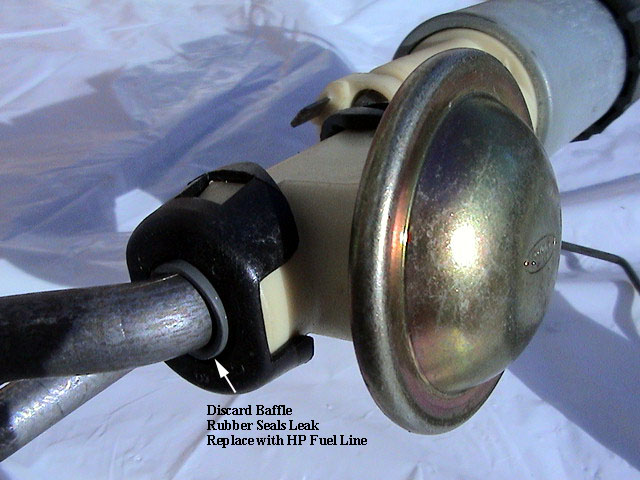
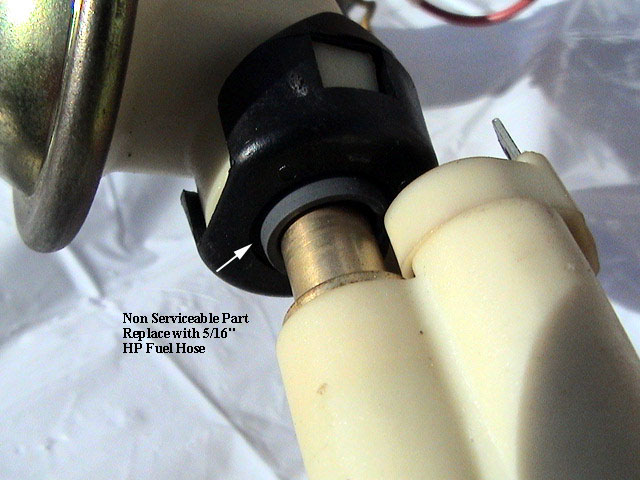
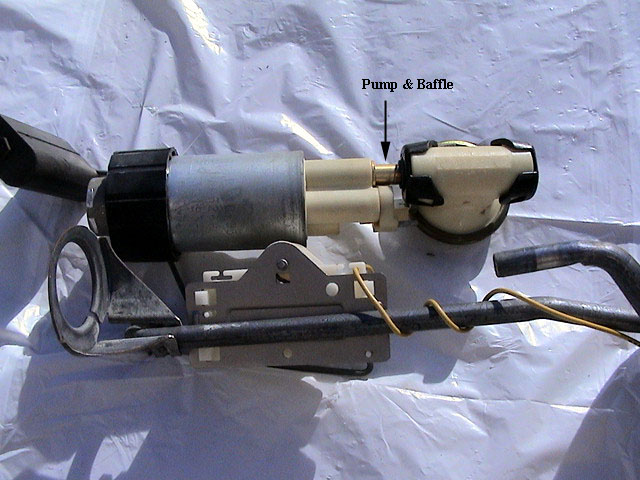
If your fuel pump stops working (no noise, no line pressure), the first thing that should be checked is the pump's voltage supply and electrical connections. An open relay, blown fuse or loose wire may be all that's preventing the pump from working. Low battery voltage can also reduce the pump's ability to generate pressure by reducing the speed of the pump motor. Replacement would also be required if the pump's check valve has failed (inability to hold residual pressure in the system after the ignition is turned off). The plastic baffle that connects between the pump and fuel pump hard line is another common failure resulting in fuel rail line pressure loss.
Installation:
Drive the car until the "Check Gauge" light comes on signaling that you have about 2 gallons left in the tank (each gallon weights 6lbs). Disconnect battery ground cable. Then pump the rest of the fuel out into a suitable container.
Next, Lift the vehicle on a hoist, using jack stands is NOT
recommended. Keep ALL lights and electrical power away from the car while
you are working with the gas tank.
|
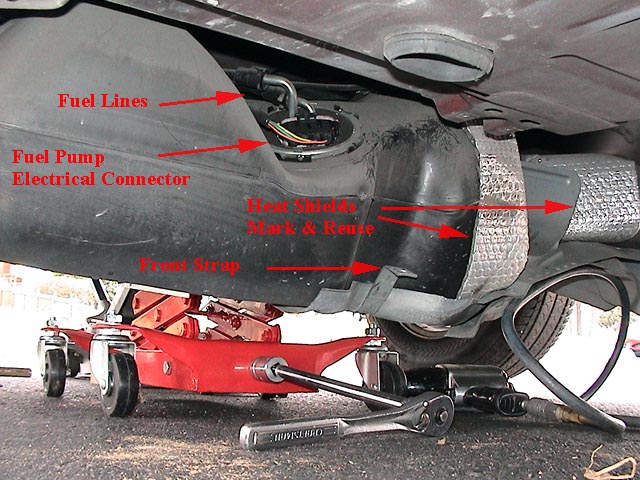
Next, remove the rear section (cat-back) of the exhaust system and heat shield.
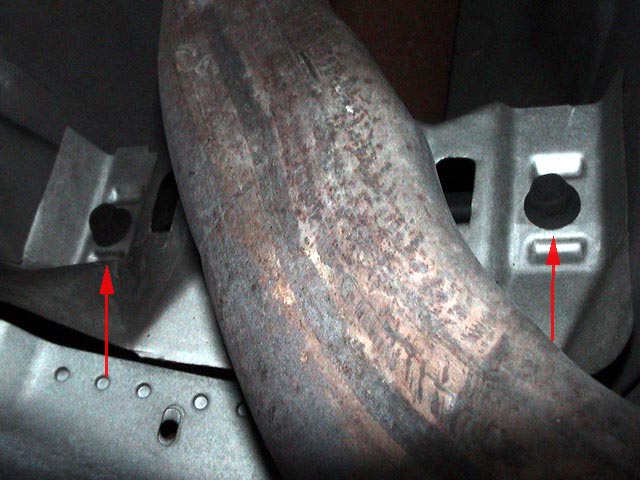
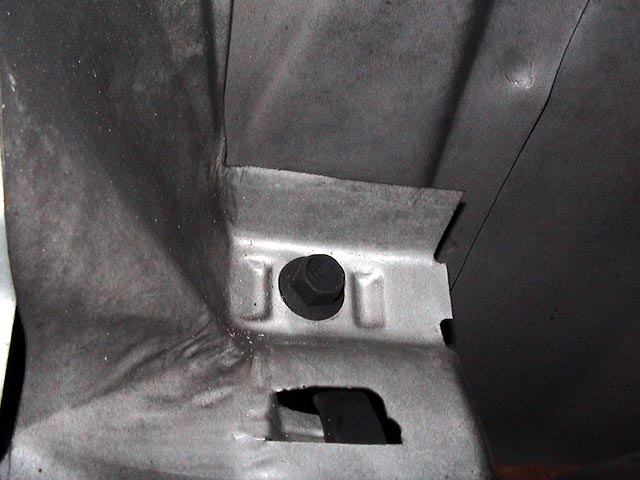
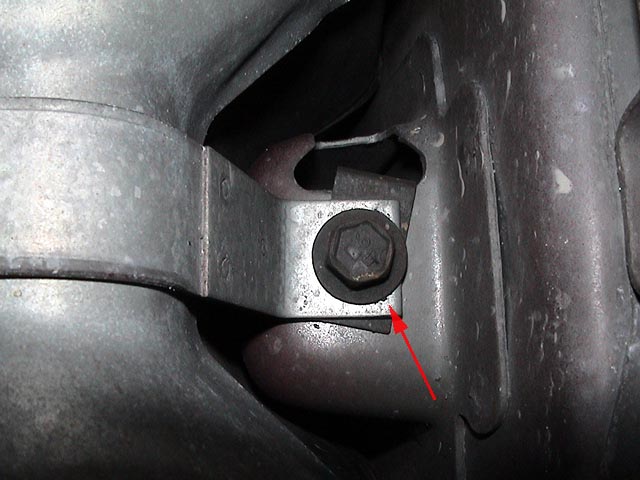
Remove the four 13mm bolts that hold the fuel tank in the car.
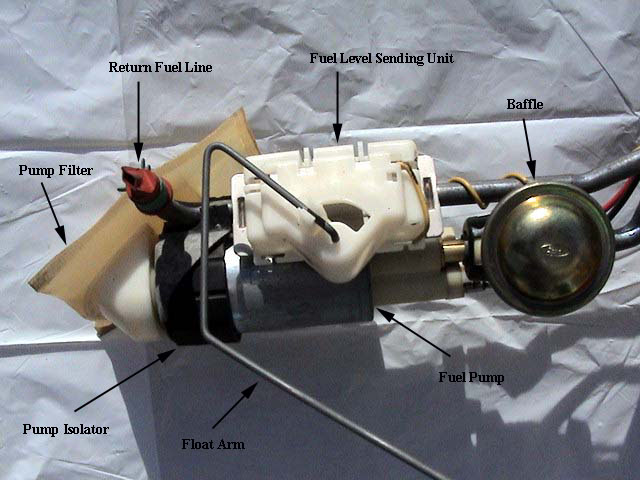
Then tilt the fuel tank down and disconnect fuel tank to filler pipe hose and vent hoses connecting the fuel tank filler pipe to fuel tank. Disconnect the fuel lines, disconnect the rear fuel supply return, vapor tubes, and electrical connector from the fuel pump then remove remove from car. Mark the location and reuse the heat shields. (see pictures below).

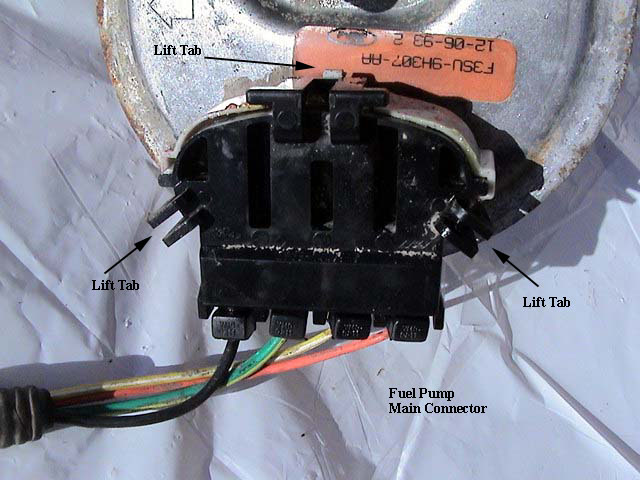
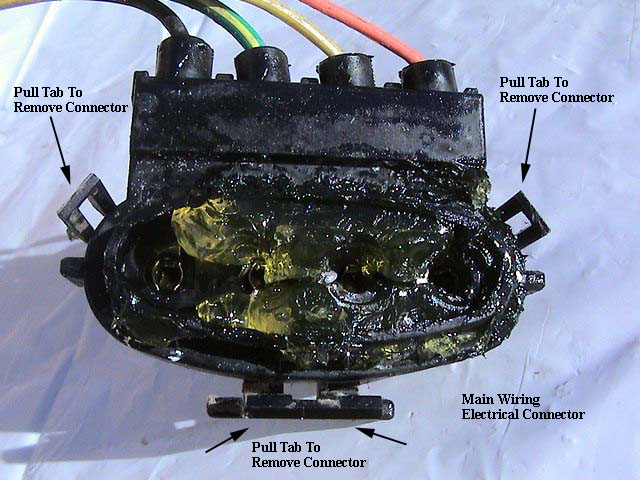
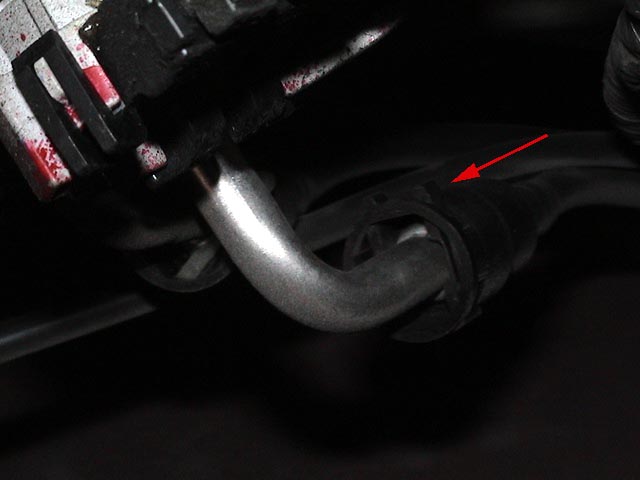
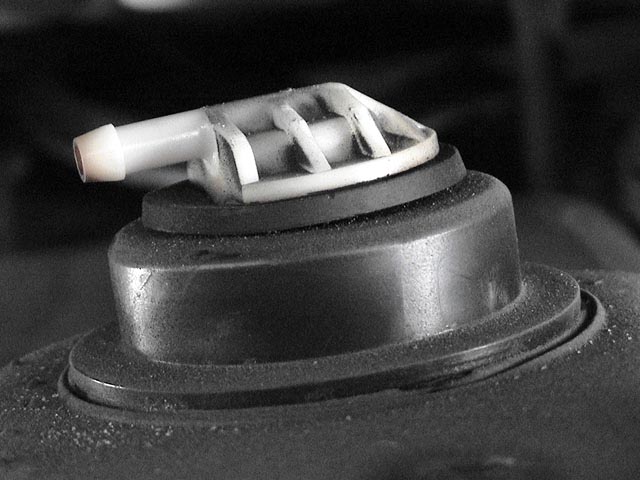
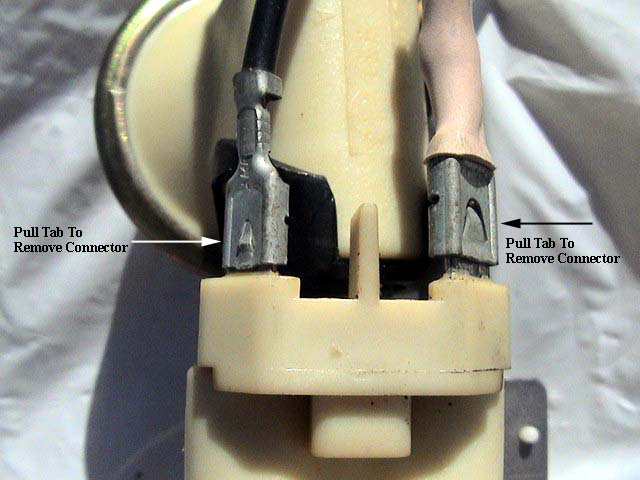
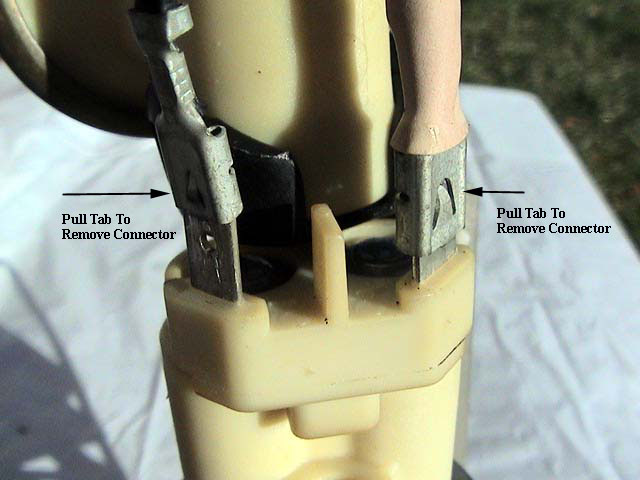
Pull locking tabs. Don't worry about breaking them as new ones are included in the Fuel Pump Kit. One Black and one White.
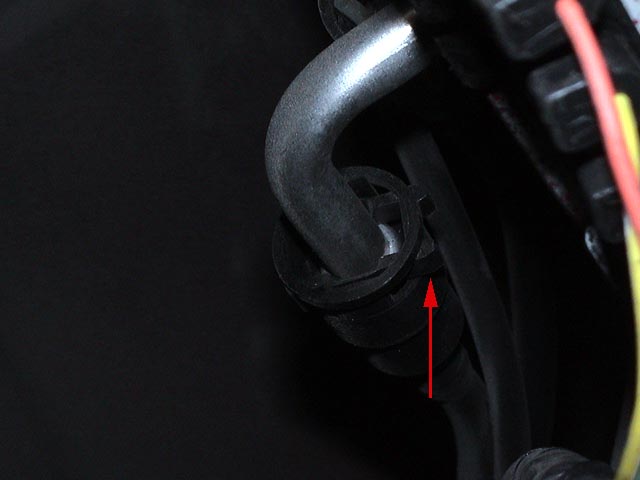
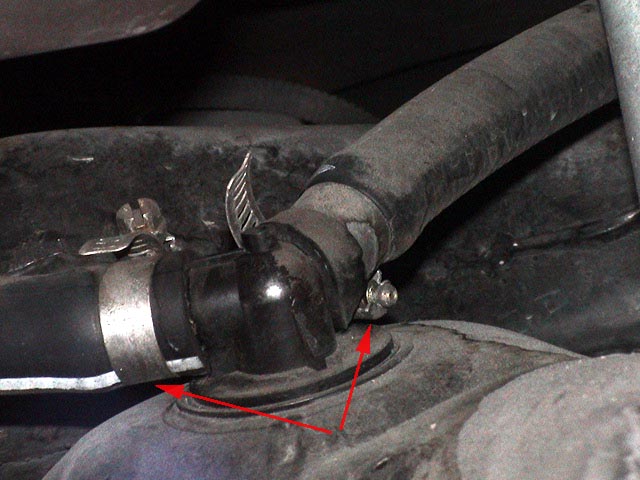
Pull hose off vent.
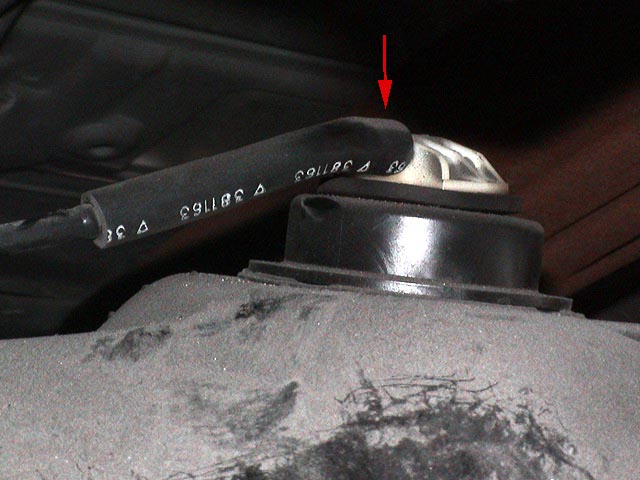
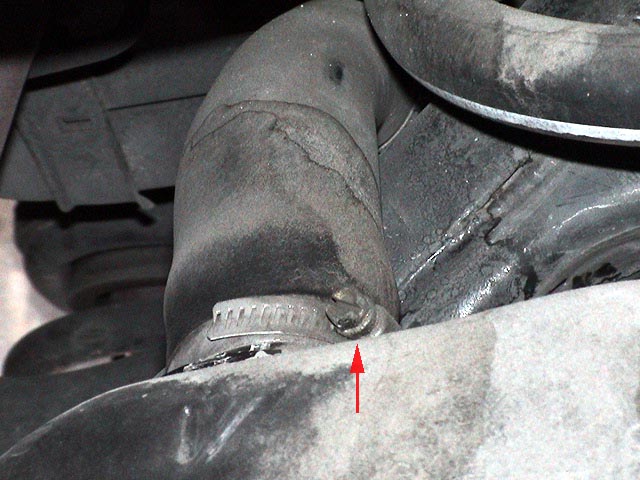
Using flat blade screwdriver or 5/16" socket loosen the clamps. Then pull hoses off.
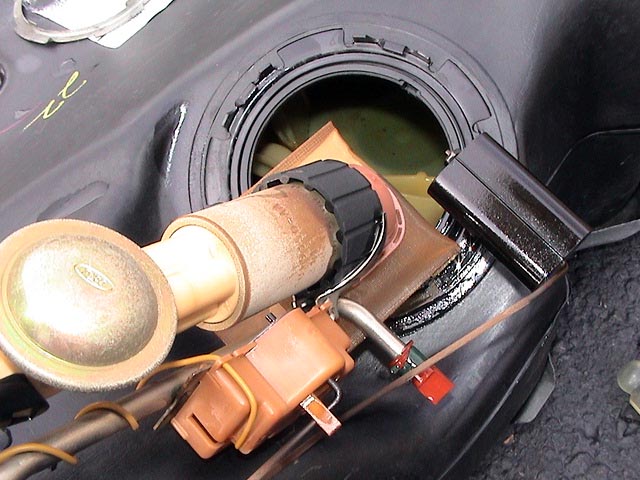
Remove fuel tank from car and move it into a clear open area. Using Parts cleaner or Brake cleaner wash dirt away from pump area. This maybe a good time to wash the tank and check for any problems. Note: Be sure to cover the fuel filler and vent openings so water does not get in the fuel.
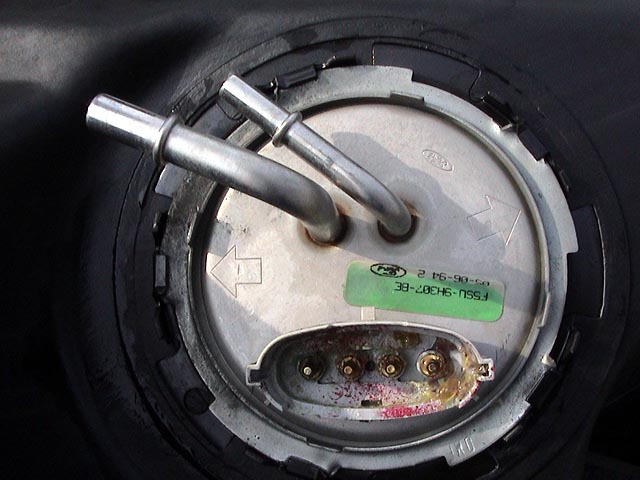
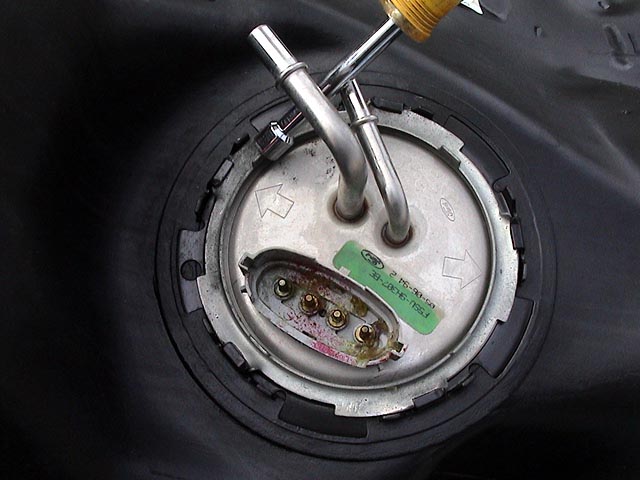
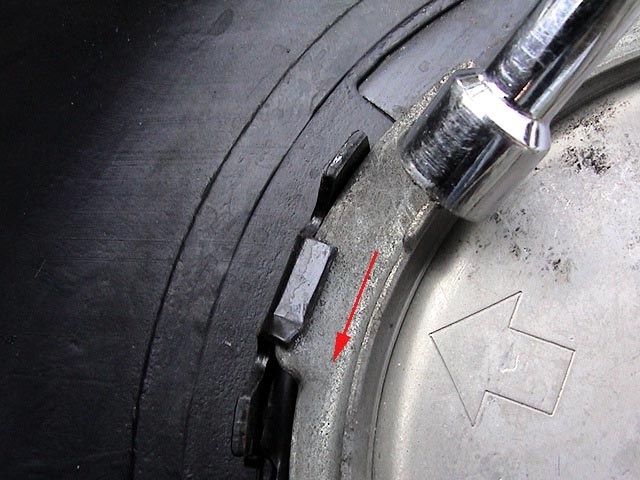
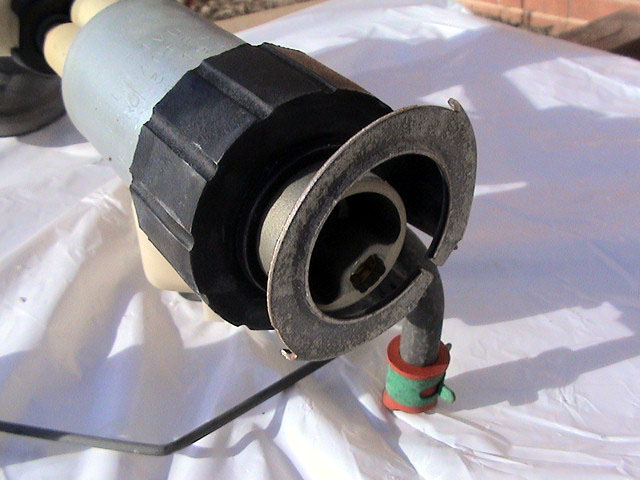
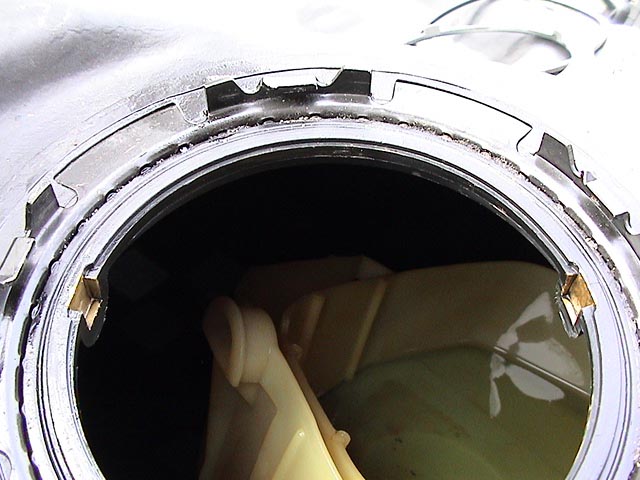
Remove the locking ring that secures the fuel pump.
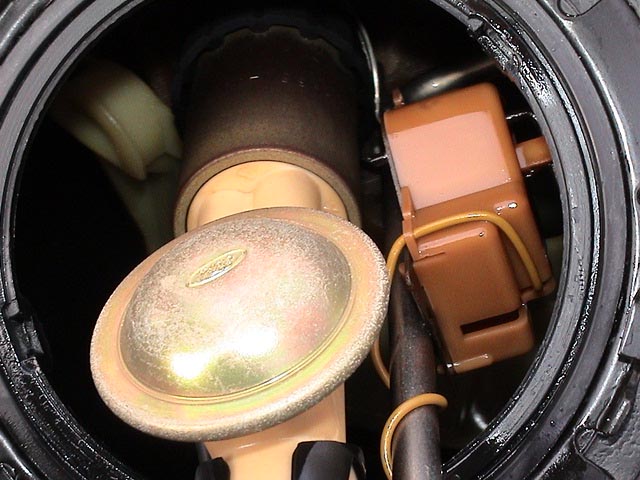

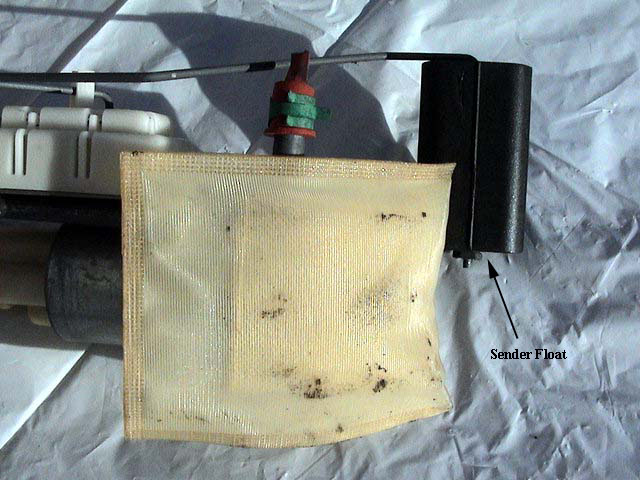
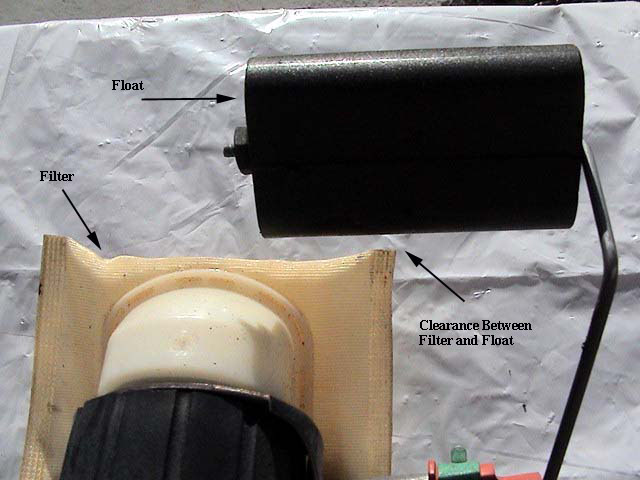
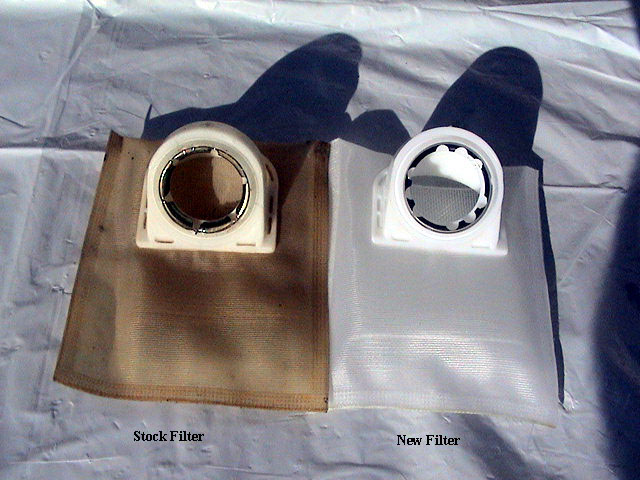
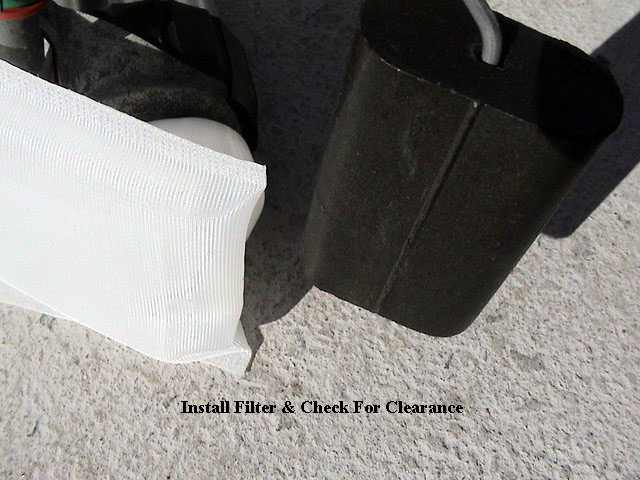
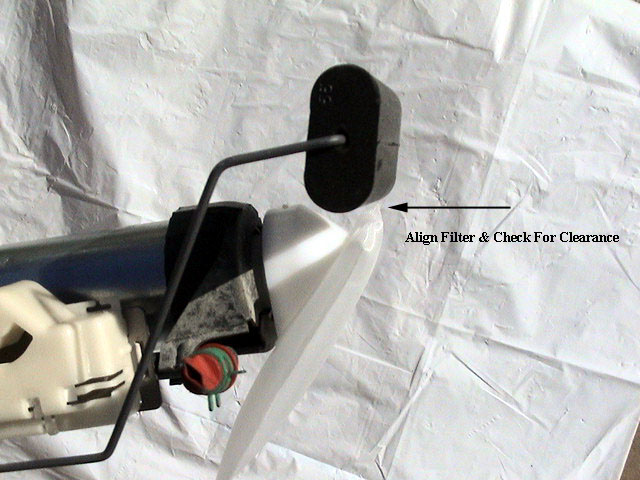
Look at the filter to float clearance. Make sure the new filter has proper
clearance from the float.
Then slightly bend the pump bracket to allow enough room to remove the pump.
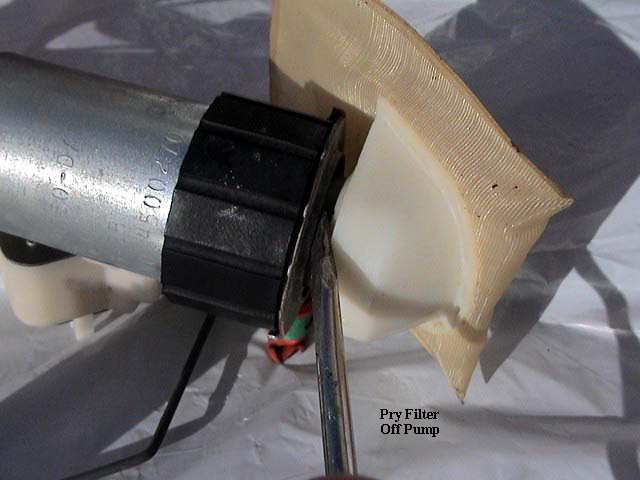
Once the filter is removed there is a retaining ring that holds the pump in the place. Using a small flat blade screw driver evenly pry the retaining clip. Note: Not all fuel pump assemblies have this retaining clip.

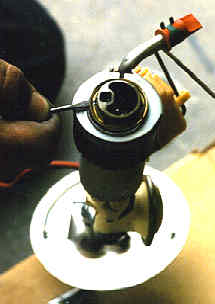
Next, Disconnect the electrical terminals from the pump by depressing the tab on the locking terminals.

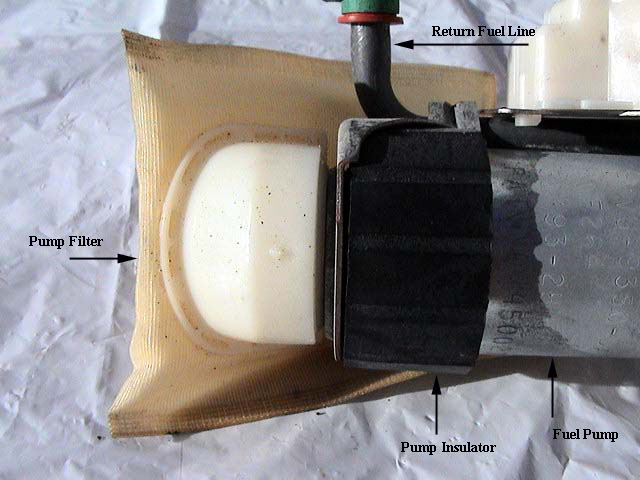
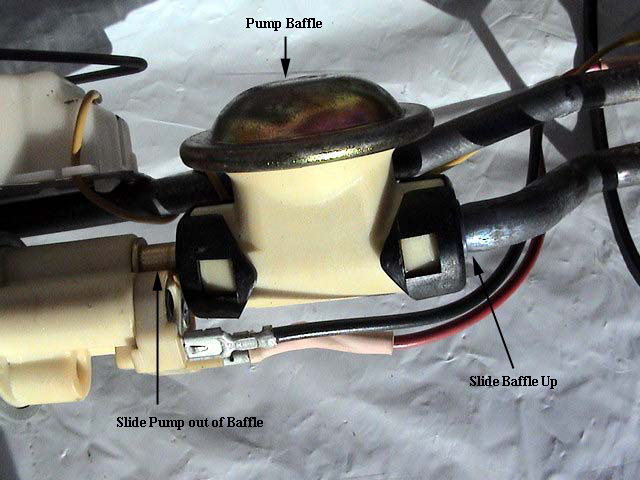
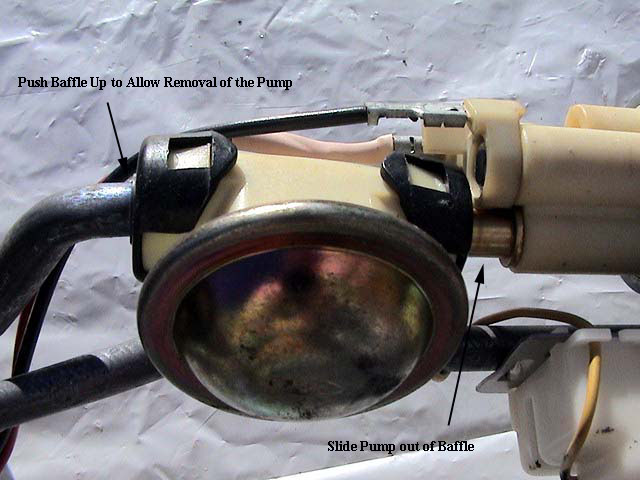
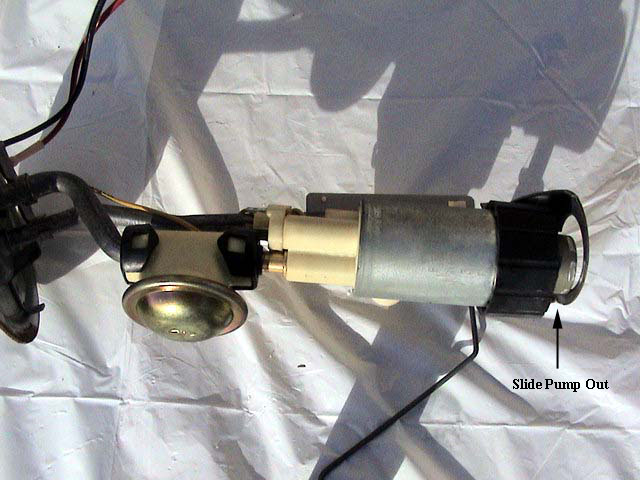
Slide the Pump Baffle up to allow clearance so the pump can be removed.
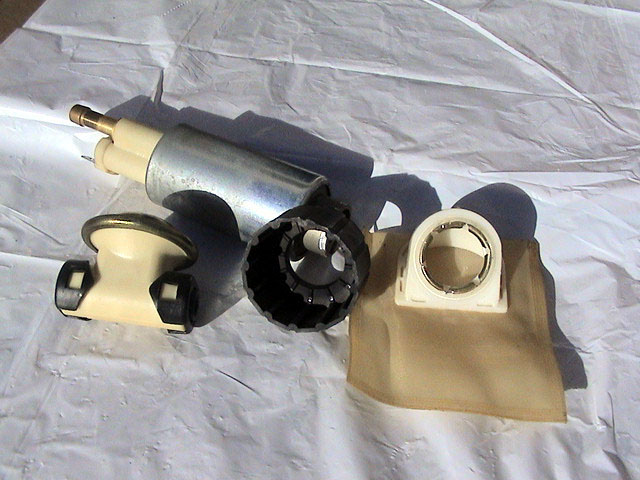
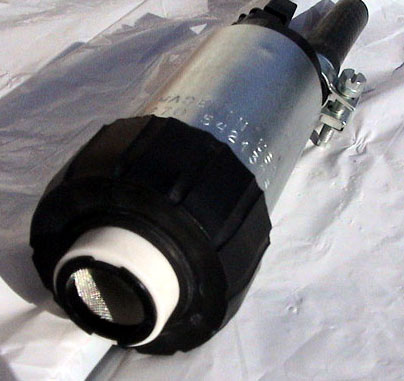
Pull black rubber insulator off fuel pump. It will be reused on new pump.
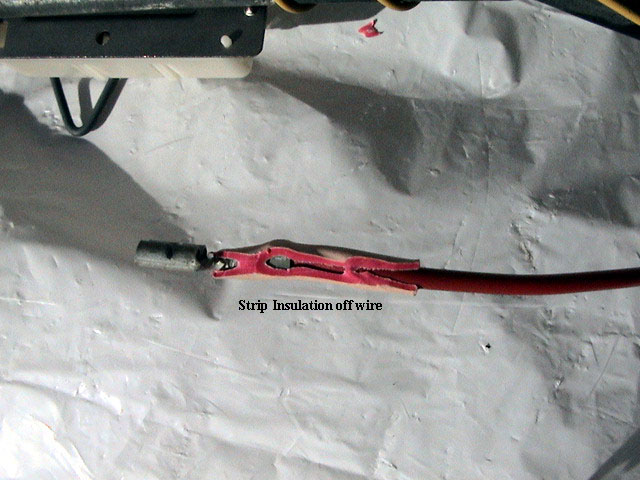
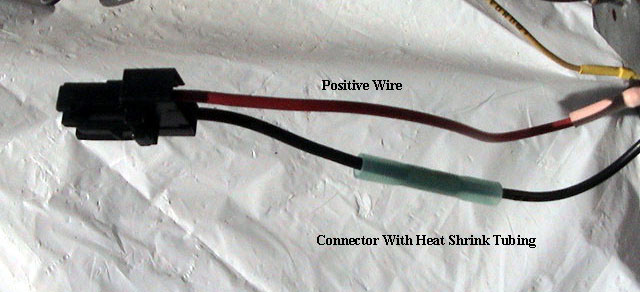
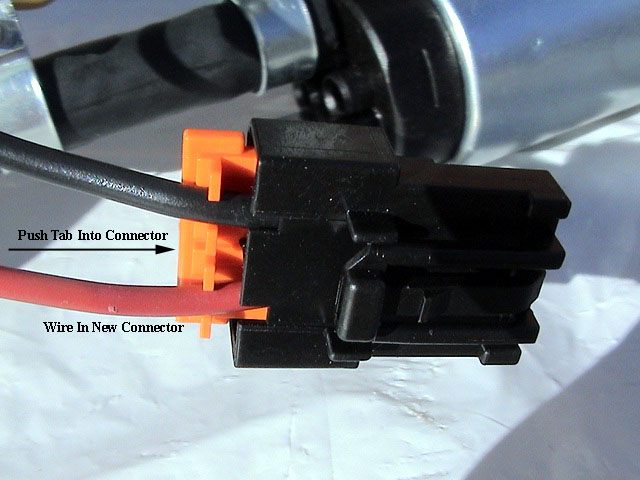
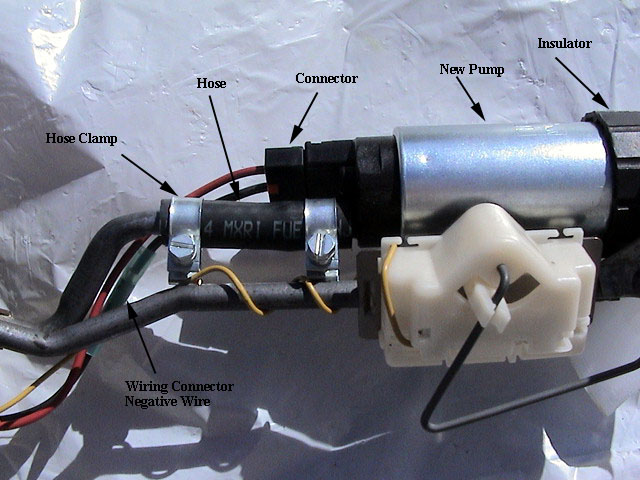
Strip the shrink tubing from the positive wiring at the connector.
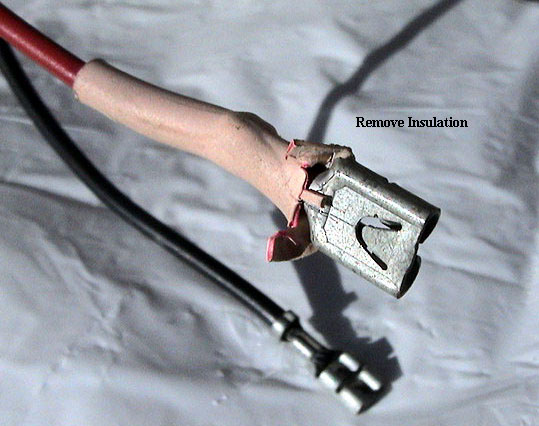
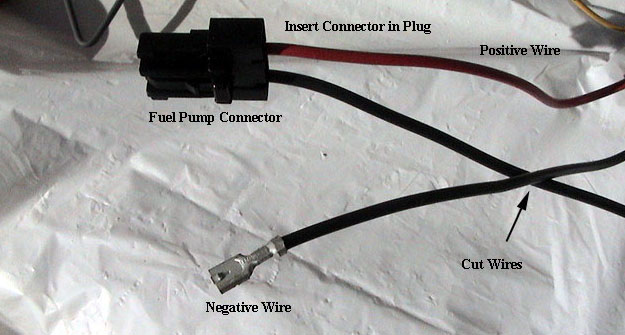
Insert the RED Positive wire with quick connect terminal into the new connector. Cut the Negative wire at about 1/2 way and using the supplied connector crimp the two wires together.
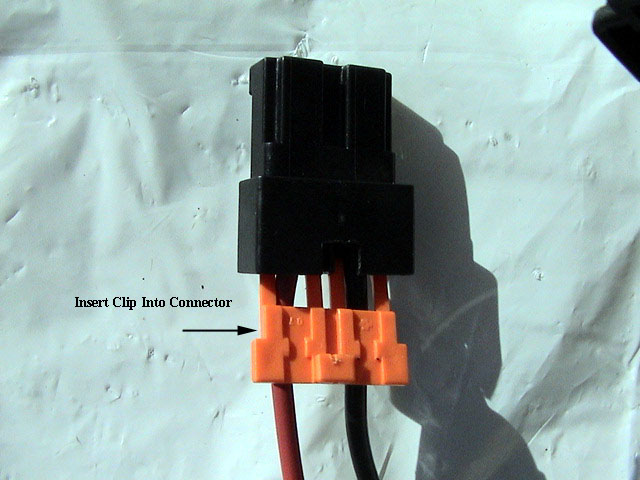
Then insert the orange retaining clip back into the fuel pump connector.
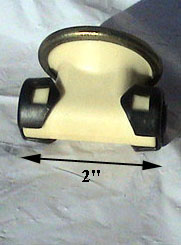
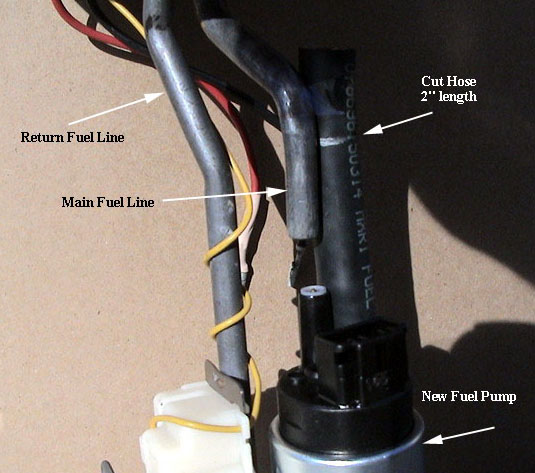
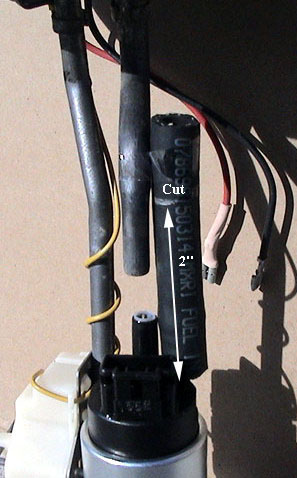
Cut the 5/16" high pressure fuel hose down to 2" and insert one end to the fuel
pump and the other to the pickup hard line. Rotate the pump until the two line
up. This hose replaces the plastic baffle and is necessary to get the most out
of your new fuel pump.
Reuse the black rubber insulator. Slide over new pump.
Clamp the hose to the pump with the supplied stainless steel clamp.
Install the pump back into the bracket. Installing the hose over the hard line and installing the clamp. Connect the power to the pump. Reinstall retaining clip to secure pump to bracket. Some models do not have this retaining clip. Finally install the filter. Align the filter before pushing it on the pump.
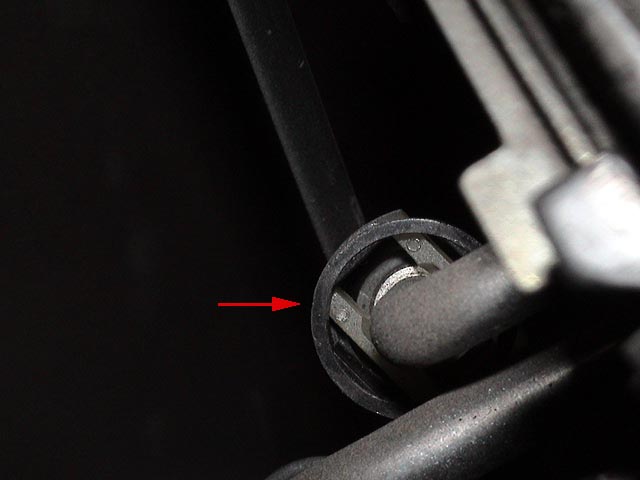
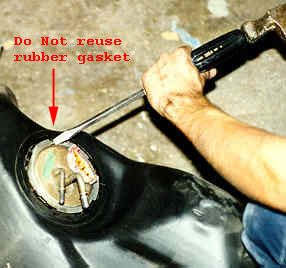
Install the pump assembly back into the fuel tank using the new gasket. Note: If the gasket is too small try stretching the rubber by pulling in sections around the entire gasket until the gasket fits correctly. (see picture below) Apply a thin layer of some wheel bearing grease to the gasket before installation. This will help the gasket seat and not distort.
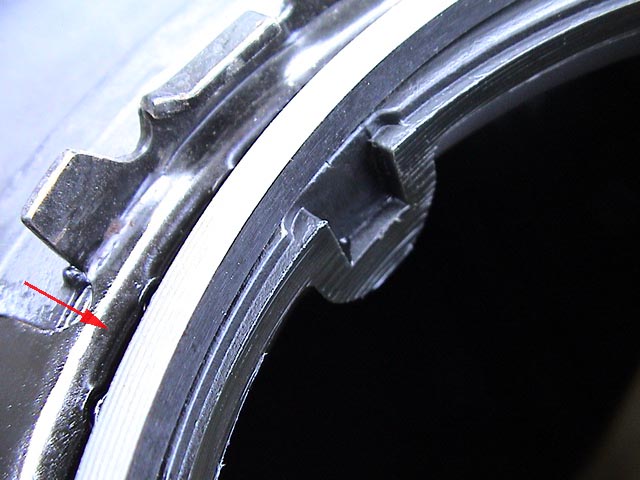
Gasket must sit inside groove for proper seal.
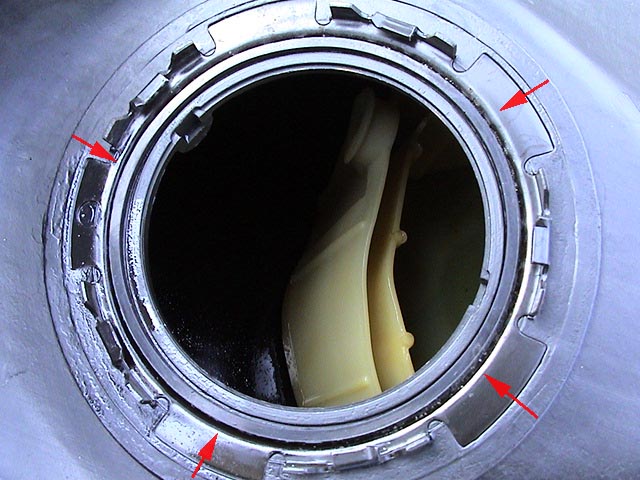
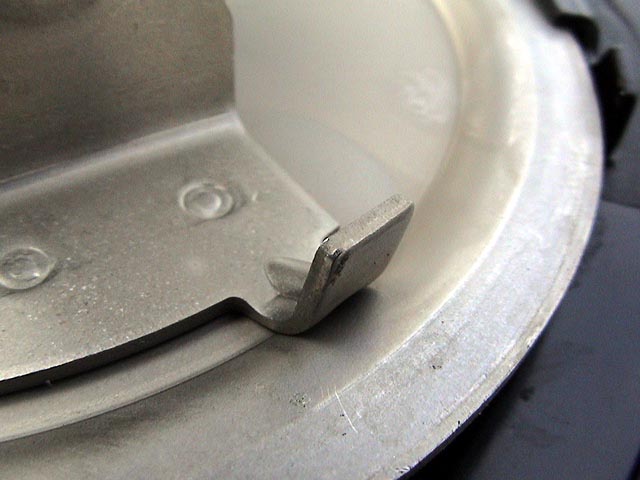
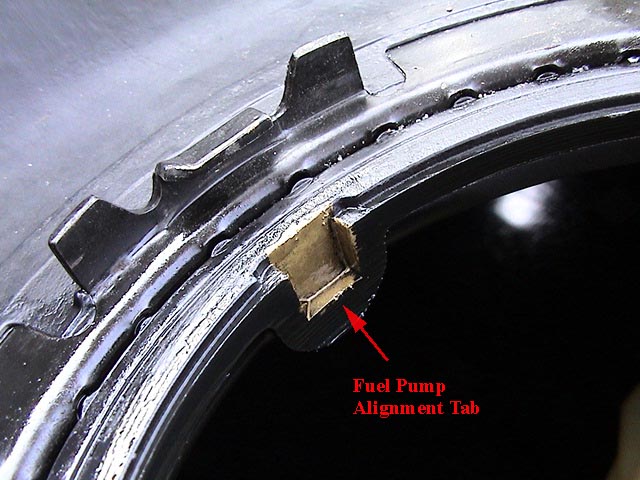
The tank uses these alignment tabs.
If your sending unit retaining ring is damaged or rusted you can get a replacement. Motormite products http://www.rbinc.com/ sells replacement Sending Unit Retainer Kits as part number 55811. The gasket is included with the kit.
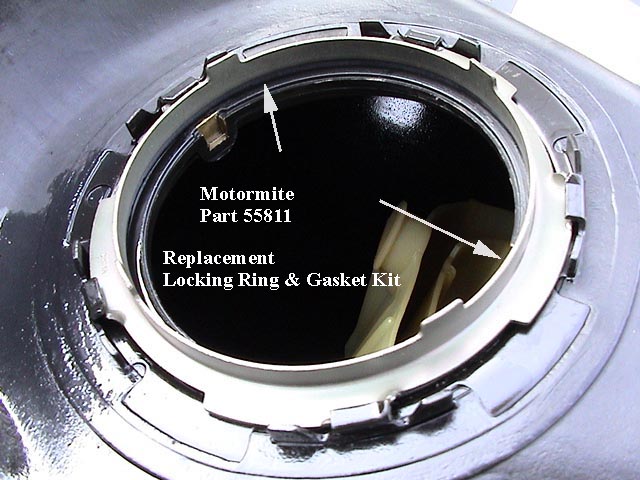
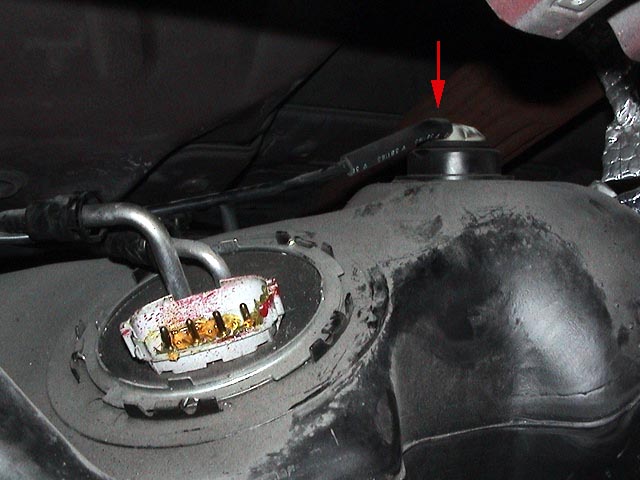
With the gasket in place hand tighten the locking ring clockwise then tap it
home with a screw driver and hammer, make sure the retaining ring is fully
seated. Reinstall the fuel tank back into the car. Reconnect the hoses and
electrical connector then tighten the support strap bolts that hold the tank in
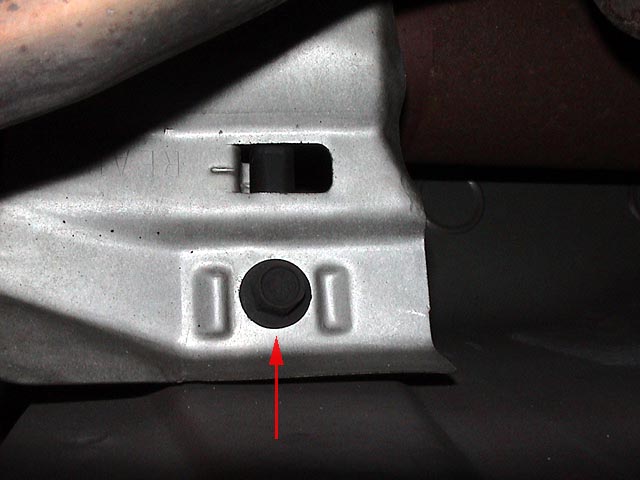
place. Install new fuel filter. Located on passengers side subframe. Special
tool is required to disconnect the fuel filter retaining clips. Available at
most auto parts stores. Lower the vehicle and reconnect the negative terminal.
Key the ignition and verify fuel pressure at the fuel rail. Also check for any
signs of fuel leaks at the pump or filter. Start the car and recheck fuel
pressure.
|
|